
The quality of a paint job is mostly decided before the first coat goes on. Comprehensive interior painting prep work is where the difference between a professional job and a DIY-looking finish shows up, and it’s the part most homeowners never see.
Surface Inspection and Repair
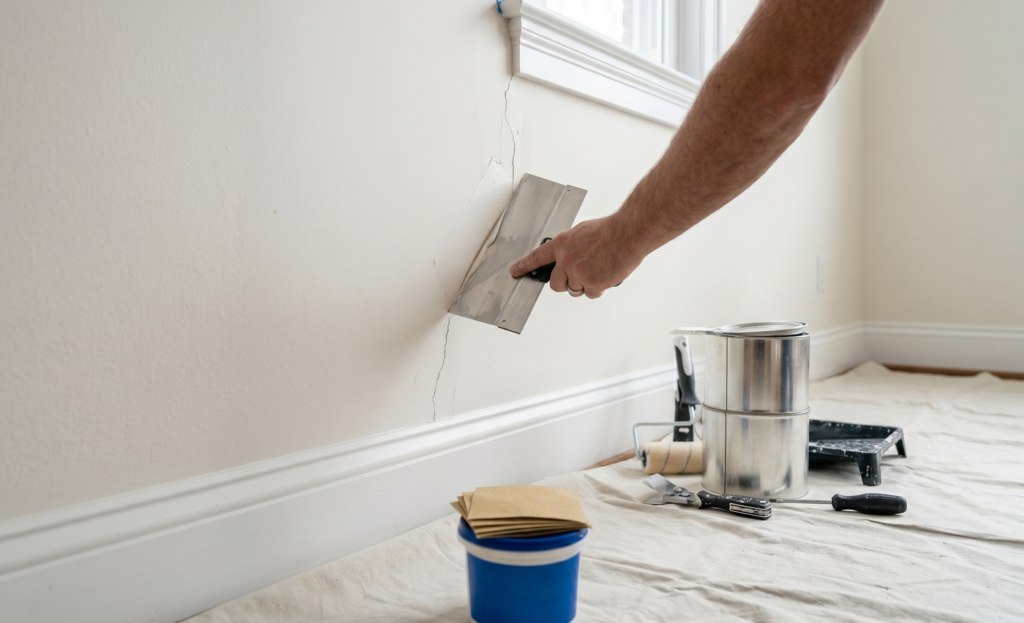
Before painting, the crew must inspect every wall and ceiling under strong lighting. This phase identifies hidden flaws that compromise the final aesthetic. In Georgia homes, high humidity frequently causes drywall tape to bubble and pull away, especially in kitchens and bathrooms. Therefore, a good painter addresses these issues thoroughly before priming.
First, workers perform rough sanding to eliminate old paint runs and uneven patches. Next, they fill nail holes with lightweight spackle and secure any shifting drywall sheets. Finally, the team cuts away failed seams, applies fresh joint tape, and skim-coats the area. They meticulously blend these repairs to match your existing wall texture. If your painter skips this critical step of interior painting prep, the fresh sheen of the new topcoat will amplify every single imperfection.
Cleaning and Surface Deglossing
Over time, walls in lived-in homes accumulate an invisible layer of airborne dust, cooking grease, and hand oils. Paint simply cannot form a strong mechanical bond with a dirty or greasy surface. Consequently, a thorough wipe-down with Trisodium Phosphate (TSP) or a mild degreasing solution is standard protocol before priming. This essential chemical wash quickly strips away the oils. As a result, your new topcoat will not bead up, separate, or fail prematurely.
The Critical Role of Deglossing
Additionally, the physical texture of the existing paint matters immensely. If the previous paint has a high-gloss finish, the surface will be incredibly slick. Rolling new paint directly over old gloss is a shortcut that inevitably leads to peeling and chipping. To prevent this issue, your painter must create proper adhesion. Usually, the crew uses fine-grit sandpaper to scuff the surface into a matte texture. Alternatively, they can apply a liquid deglosser to chemically break down the gloss so the new paint can grip safely.
Priming: When It’s Required vs. Optional
Primer acts as the essential bridge between the substrate and your topcoat. While it is not always needed on pristine walls, skipping it in critical situations will compromise your project. For example, you absolutely need a dedicated primer when covering dark colors, sealing newly patched areas, or painting raw drywall. Furthermore, switching from old oil-based paint to modern latex requires a specialized bonding primer.
Fortunately, the right product depends entirely on the situation. Stain-blocking primers permanently seal away water marks and smoke damage. Meanwhile, high-adhesion primers grip slick, glossy surfaces. Therefore, your painter should always select a primer based on the specific condition of your walls instead of using one generic product for the entire house.

Protection and Masking
Flooring and Furniture Defense
Precision Masking and Trim Taping
A truly professional paint job is defined as much by where the paint does not go as where it does. Long before a paint can is ever opened, a major portion of the labor time should be dedicated to isolating the workspace and protecting your home.
Drop cloths on every floor surface and plastic sheeting over furniture that can’t be moved are completely non-negotiable. Professional painters use heavy-duty canvas drop cloths for walking paths and floors, as canvas absorbs accidental drips and prevents tracking wet paint through the house. Plastic sheeting encapsulates furniture, sealing it off from airborne paint mist and fine sanding dust.
Watch for painters who only tape easy, straight runs and try to freehand the rest to save time. Instead, a meticulous professional thoroughly tapes the edges of all trim, crown molding, and baseboards. They also secure window frames, door jambs, and hardware hinges. Furthermore, the crew should completely remove light fixtures, switch plates, and outlet covers rather than taping around them. Once workers apply the tape, they must press it down firmly to activate the adhesive seal. Consequently, clean, razor-sharp lines come from proper taping and cutting in, not from hoping for a steady hand.
The 80/20 Rule of Professional Painting Experienced industry professionals know that a high-quality interior paint job consists of roughly 80% preparation and only 20% actual painting. The rolling and brushing are simply the final, visible steps of a much larger, foundational process.

Choosing a Partner Who Values the Process
When interviewing potential contractors for your upcoming home renovation, don’t be afraid to ask direct, detailed questions about their preparation process. Ask them how they handle cracked drywall, what type of primers they plan to use, and how they protect hardwood floors or delicate carpeting. A contractor who glosses over these questions is a contractor who will likely deliver a sub-par finish that begins to fail within a year.
After 40 years of interior work across Gwinnett County, we’ve found that thorough, uncompromised interior painting prep work is the single biggest factor in whether a homeowner remains happy with their investment six months, one year, or five years down the road. The brand and color of the paint itself matter, but they are only as good as the surface foundation on which they sit.
If you are ready to transform your living spaces with a dedicated team that refuses to cut corners, values craftsmanship, and treats your home with the utmost respect, we invite you to view our complete line of residential options.